At this stage, one should know
If one does not know either of the above areas, go back over the Student Guide: “Word 2000 for Windows” (available from the print room).
The majority of the exercises in this lab are based on "A Guide to Word
2000, Chapter 1" (available from the print room).
<< -- Return Home
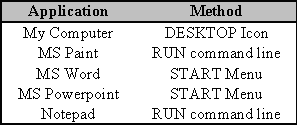
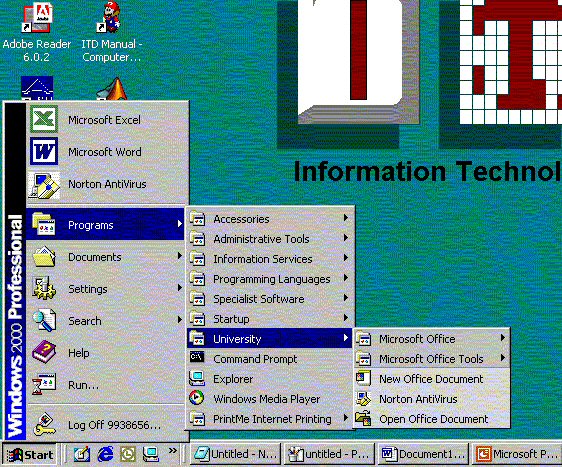
Start the following applications using the various methods indicated:
“Maximise” and “Minimise” each and all of the 5 applications, switching between them from the “Task Bar”.
![]()
“Restore Down” (![]() )
all of the 5 applications so they are all visible.
)
all of the 5 applications so they are all visible.
Notice that scroll bars appear along the sides of application windows when they
are required.
(a) Switch between the 5 programs, using the taskbar buttons as shown above.
(b)
Switch between the 5 programs, by pressing the ALT - TAB keys. (Hold down ALT, and press TAB to
tab through the applications.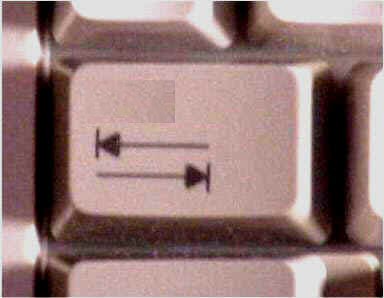 - The TAB Key
6. Try and drag the Taskbar so it is situated along the top edge of the desktop.
See Here >>
7. Try and drag the Taskbar so it is situated along the left edge of the desktop.
See Here >>
8. Don't be afraid to experiment and change the appearance of your desktop.
Nothing can be done that cannot be undone.
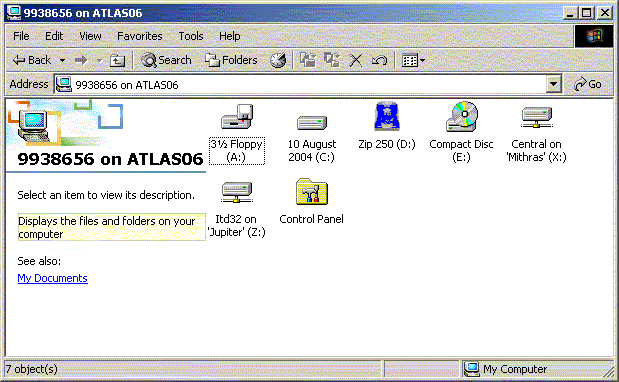
1. Open "My Computer" using the DESKTOP
Icon (as done previously).
2. Double Left Click on the Hard Disk (10 August 2004 C:)
3. Double Left Click on the Folder "WorkArea"
4. Create a Sub Folder inside WorkArea with your idnumber as its name (e.g. 040000)
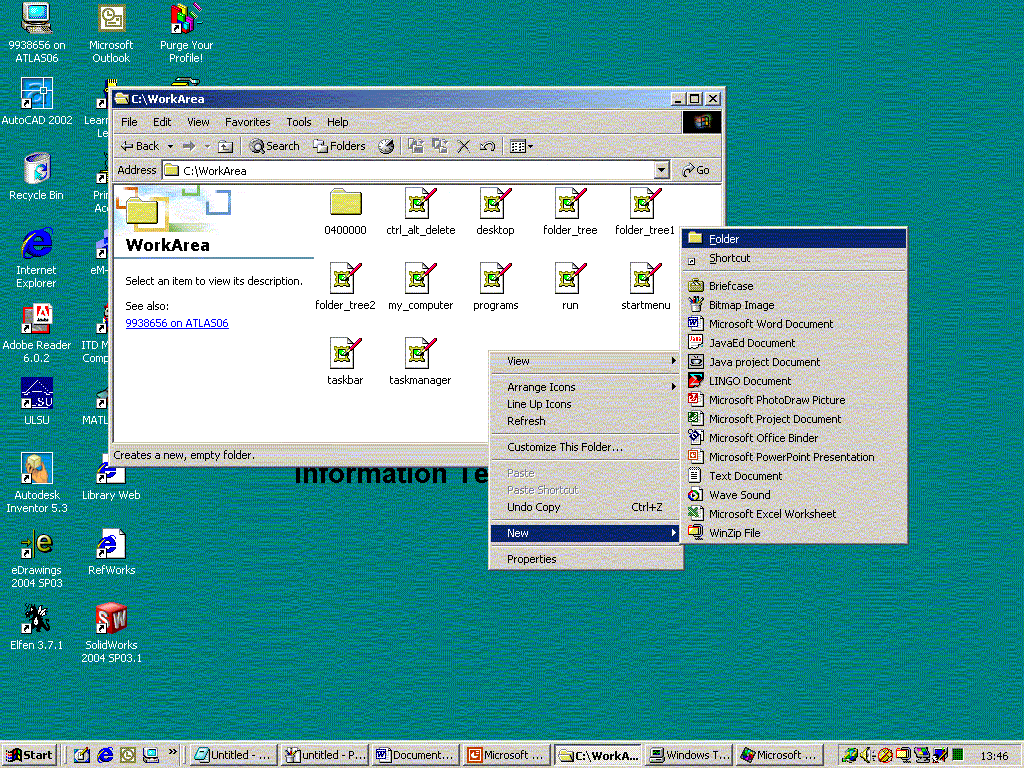
- How to Create a Folder - Right Click on a free
white space (not on a file or folder !) Select "NEW" and
"FOLDER". Note: A New Shortcut (link) and/ or New Documents can be
created in this fashion also. See Here >>
5.
Create a further three Sub Folders within your idnumber, called
"computers", "maths" and "projects".
6. In order to see the STRUCTURE of these folders click on the
"Folders" button on the standard toolbar. ![]()
7. The Following should be the Folder Structure Created: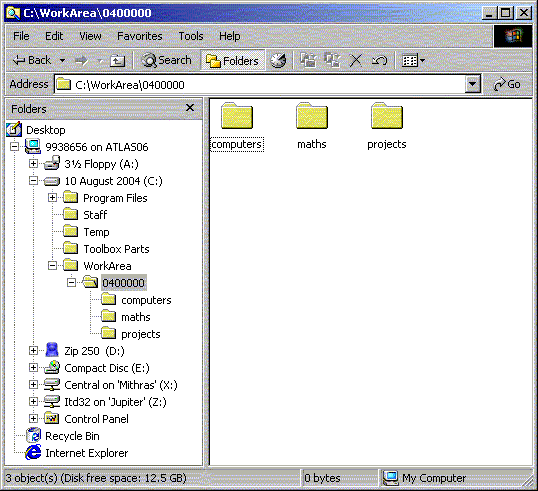
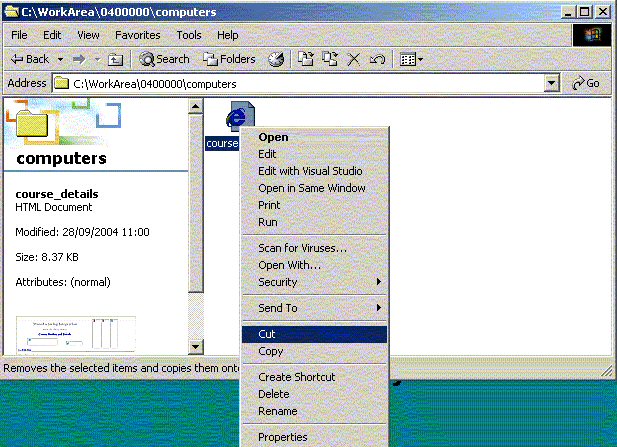
In order to move, copy, rename or delete files or Folders, Right Click on a
particular file/ folder to see all the available options:
8. Inside the "computers" folder created earlier, create a New
"Bitmap Image" called 'test image.bmp' (Hint: This is done using the
same method as for a new folder)
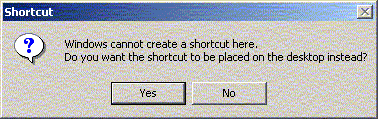
9. Create a "Shortcut" to this 'test image.bmp' file and MOVE it
to the desktop. [The Desktop is very useful for
storing/ placing files and folders temporarily]
10. Copy the
"Library Web" shortcut from the desktop into the computers folder
created earlier. [Shortcuts will work, regardless of
where they are stored]
11. Rename the "Library Web"
shortcut to "University of Limerick Library".
USING ZIP DISKS
Care MUST be taken when using and handling Zip Disks. Although they store nearly
70 times as much information as a floppy disk, they are as susceptible to
corruption. NEVER directly eject a ZIP disk using the eject button while logged
on. Right Click on the Zip Disk in My Computer, and choose "Eject". If
this fails, log off, and then eject the Zip Disk. Consider this been warned, as
loss of report or any associated files will not be accepted as excuses. Back-up
information.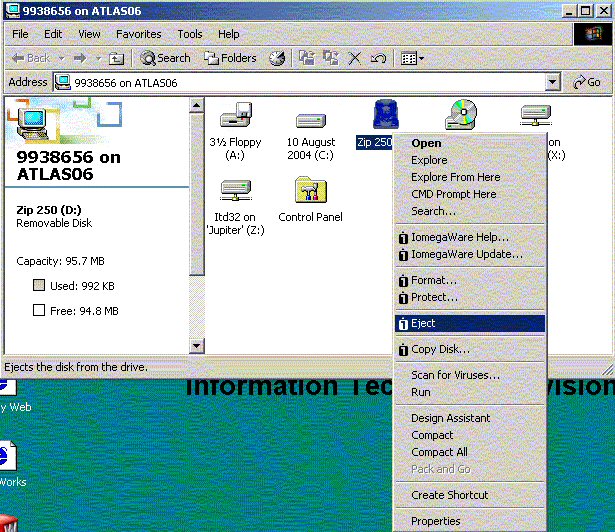
All course material, exercises, and extra resources are stored on computer Servers on a LAN
(Local Area Network - A number of computers connected together). It is essential
that one knows how to find, locate and copy material and assignments off the
network. A server is "MAPPED" onto a local pc, enabling the copying of
files and folders. A "Mapped" computer has the following ICON in
"My Computer":![]()
1. By Default, there are two Servers "Mapped" onto your student PC,
Mithras and Jupiter.
2. Double Left click on Mithras (Central on Mithras X:)
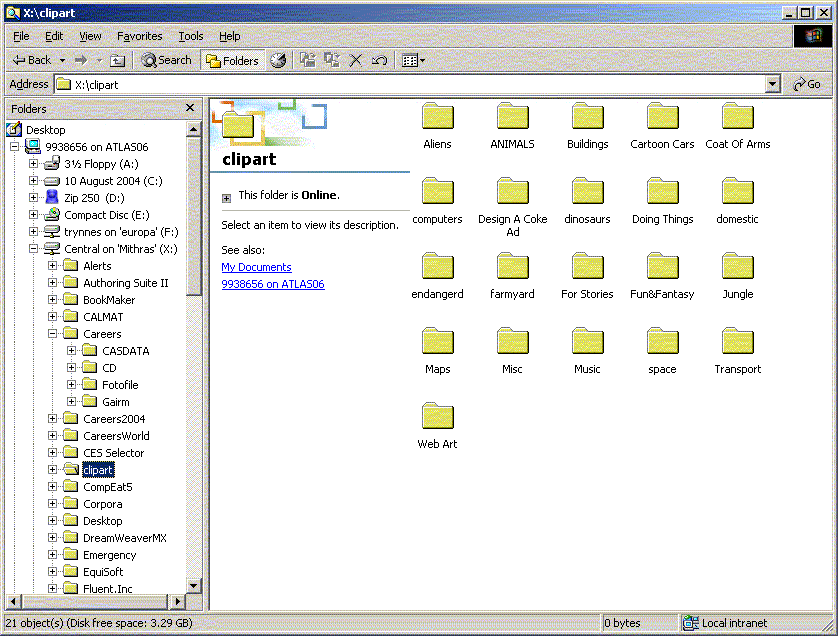
3.
Go to the "Clipart" folder and make a "Shortcut" to the "Computers" sub
folder. Place the shortcut on the desktop (done by default) and move this
shortcut into the computer folder created earlier (i.e. into
c:\WorkArea\040000\computers\). See Here
>> and Here >>
 Creating a Shortcut to files and folders on a LAN
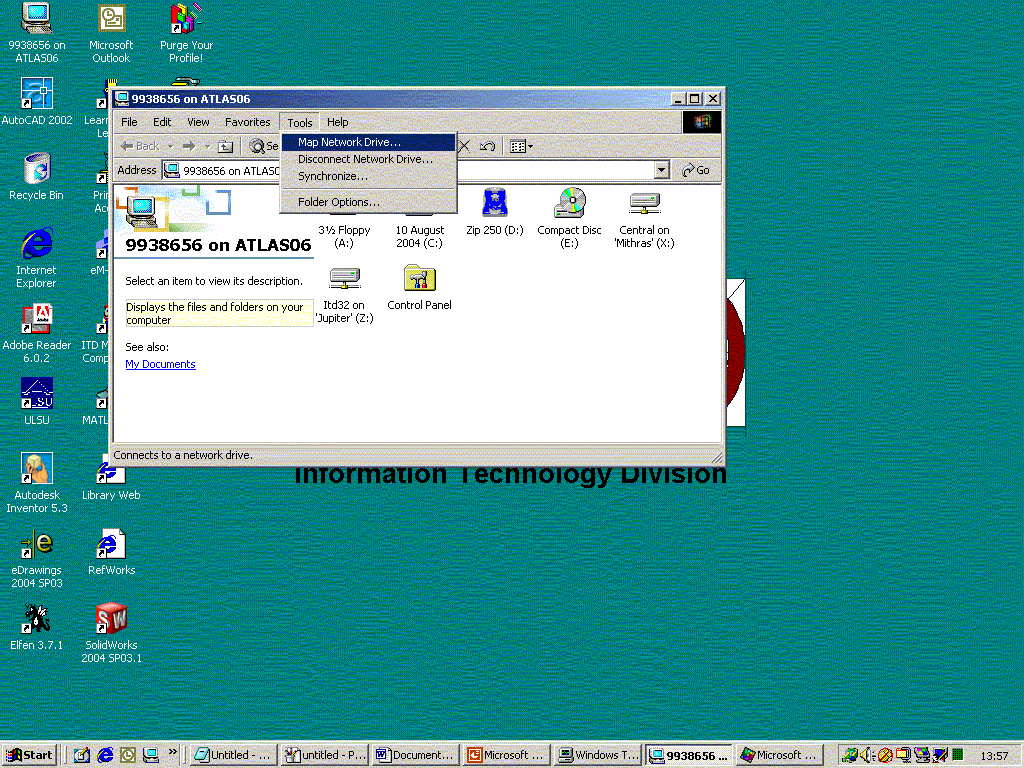
4. Close down all applications and open "My Computer"
using the desktop Icon.
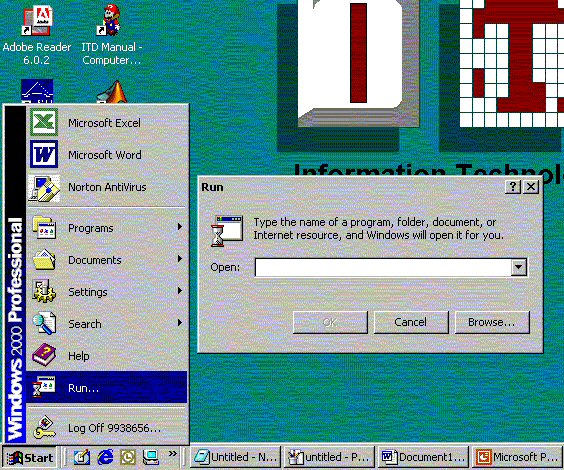
5.
From the "Tools" menu select "Map Network Drive". See Here
>>
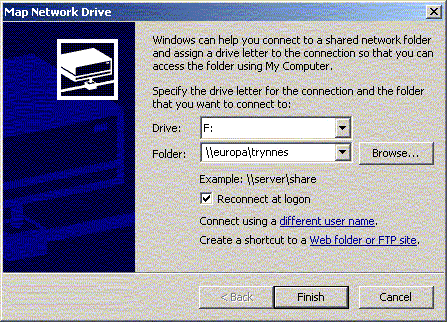
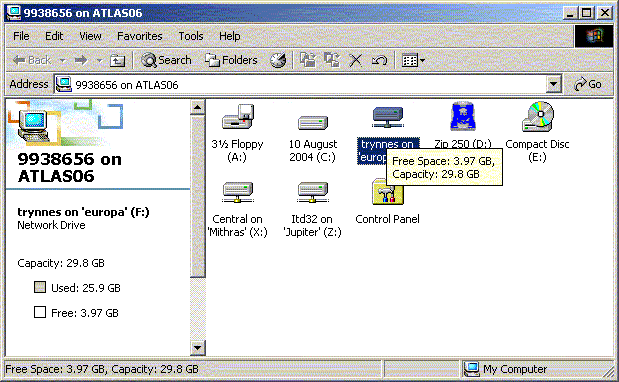
6. In the "Map Network Drive" dialogue box, type in
the following address: \\europa\trynnes and click FINISH. See
Here >>
7. The "Mapped" server will now appear in
"My Computer" along with the other default ones. Explore this
"Mapped" server. See here >>
It is helpful and essential for many to be able to "Customise" and change the settings of the computer, whether it is changing from a right to a left handed mouse, or making the font size bigger.
1. Open the Control Panel. (Hint: This is best done via "My
Computer") See Here
>>
2. Under the Mouse item, change the speed and acceleration of
the mouse.
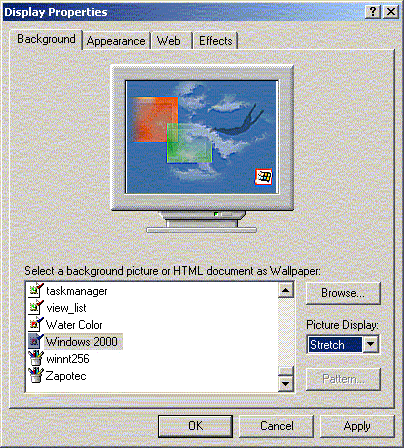
3. In order to obtain the properties of the Display and
Background, Right Click on the desktop (not on any files or folders!) and select
properties.
4. Customise the background on your desktop. See
Here >>
By Default, in UL, a printer is setup on your computer. To see what printer
is installed on your PC, or to see the properties of the printer installed,
carry out the following:
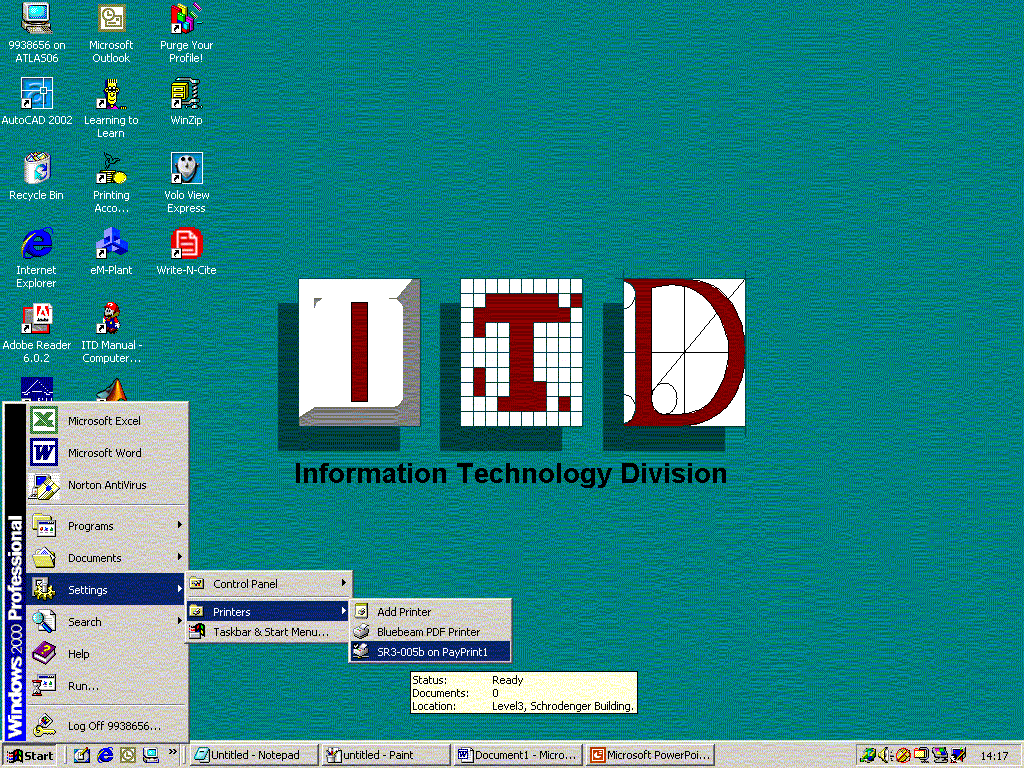
1. Left Click on the start menu.
2. Click on
Settings and select printers. The currently installed printers should appear.
Left Click on any printer for its status. See Here
>>
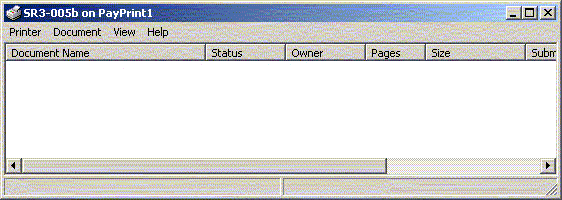
3. Clicking on any printer will show the queue for that printer,
whether it is out of paper etc. One can cancel printing of documents here. See
Here >>
If you are having problems setting up your email account, the computer lab
attendants will assist you.
1. Open up Microsoft Outlook on the desktop.
2.
Compose a new message. See
Here >>
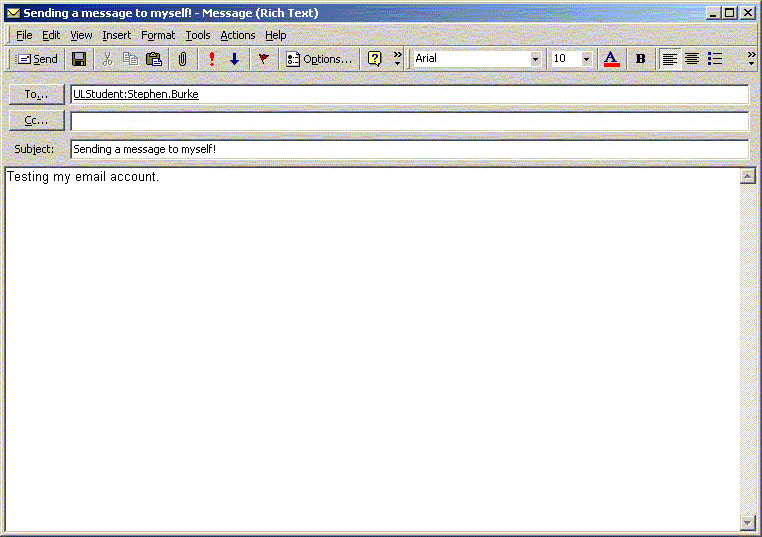
3. Enter your own e-mail address in the To box
(0400000@student.ul.ie)
4. Enter Sending a message to myself! in the Subject
box.
5. Enter Testing my e-mail account in the Message box.
6.
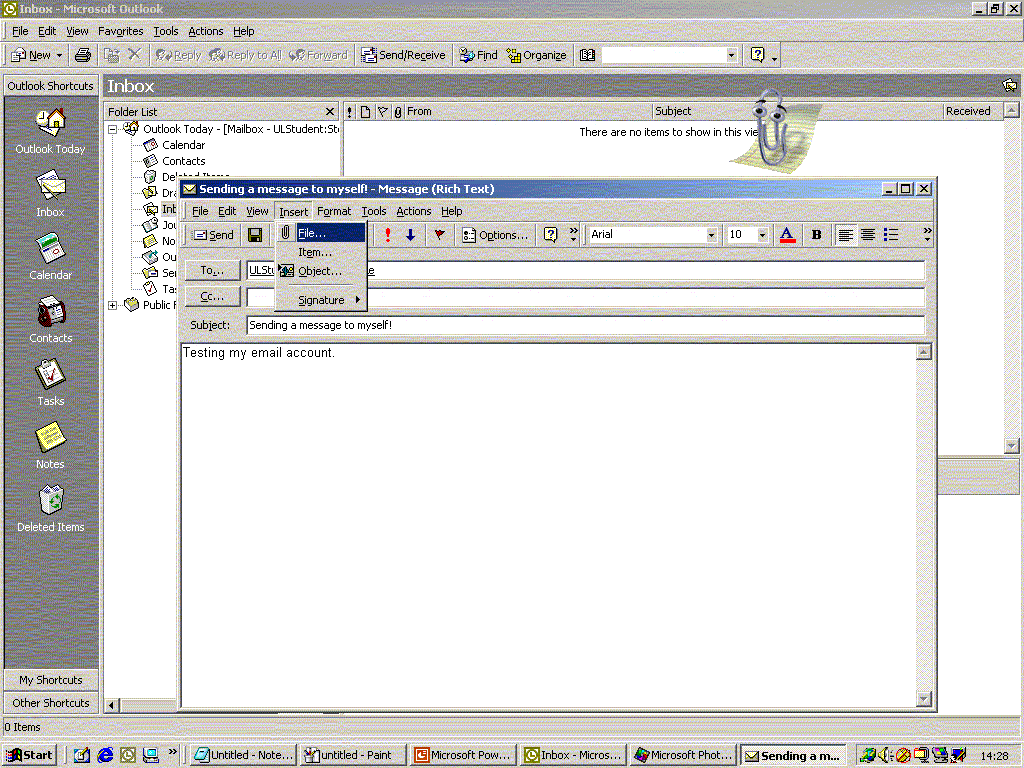
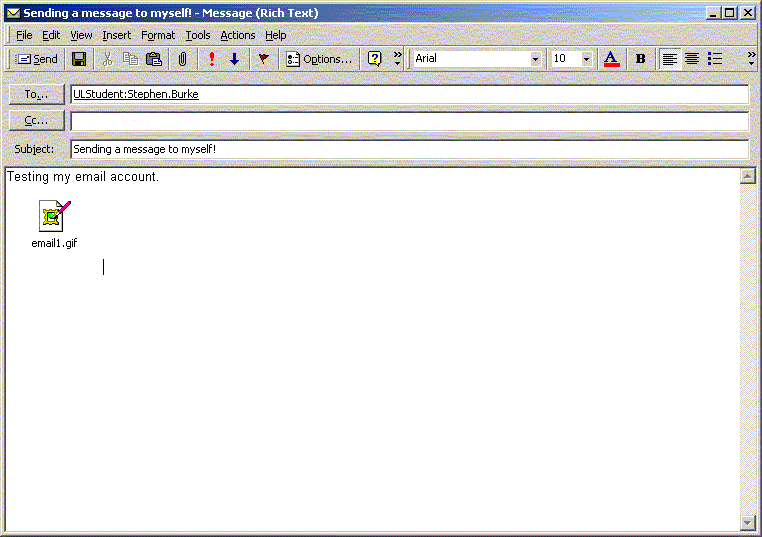
Locate a picture in the Clipart Folder on the Server Mithras, and insert this
picture into the email as an attachment. Either drag and drop the picture file
into the Message (body) of the email or go to "Insert" drop down menu
and select "File". See Here >>
and Here >>
7.
Send the email.
8. You should receive the email in a matter of moments, into
your Inbox.
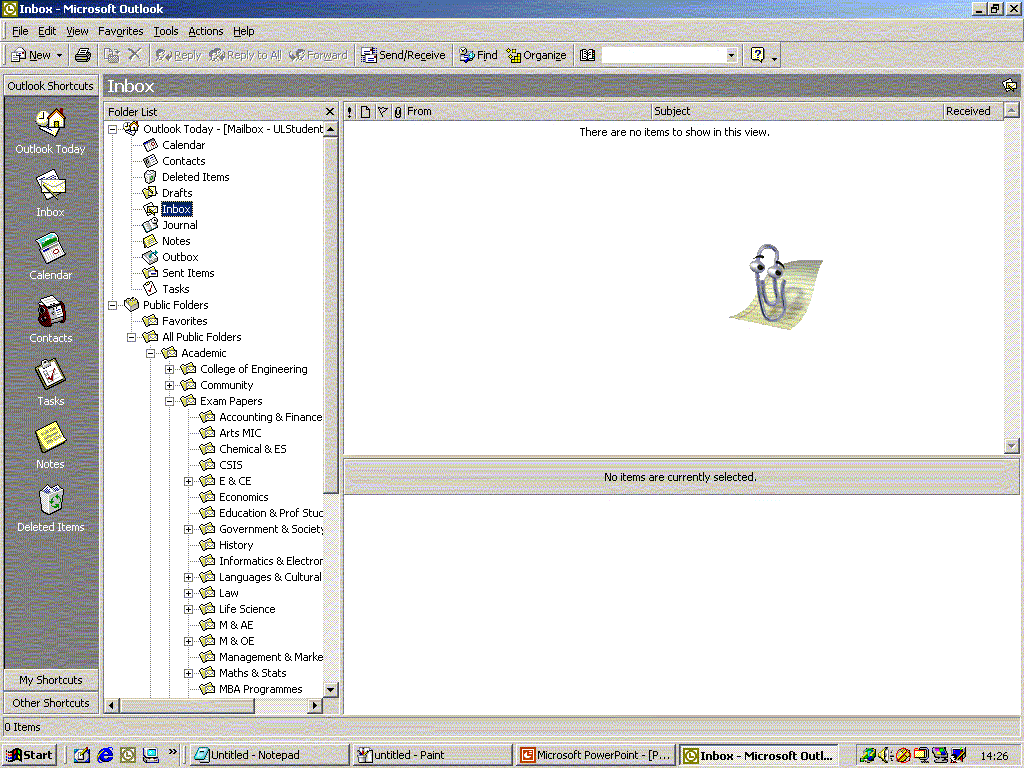
In order to access exam papers and Lecturer material on
"PUBLIC FOLDERS" you will need to do the following:
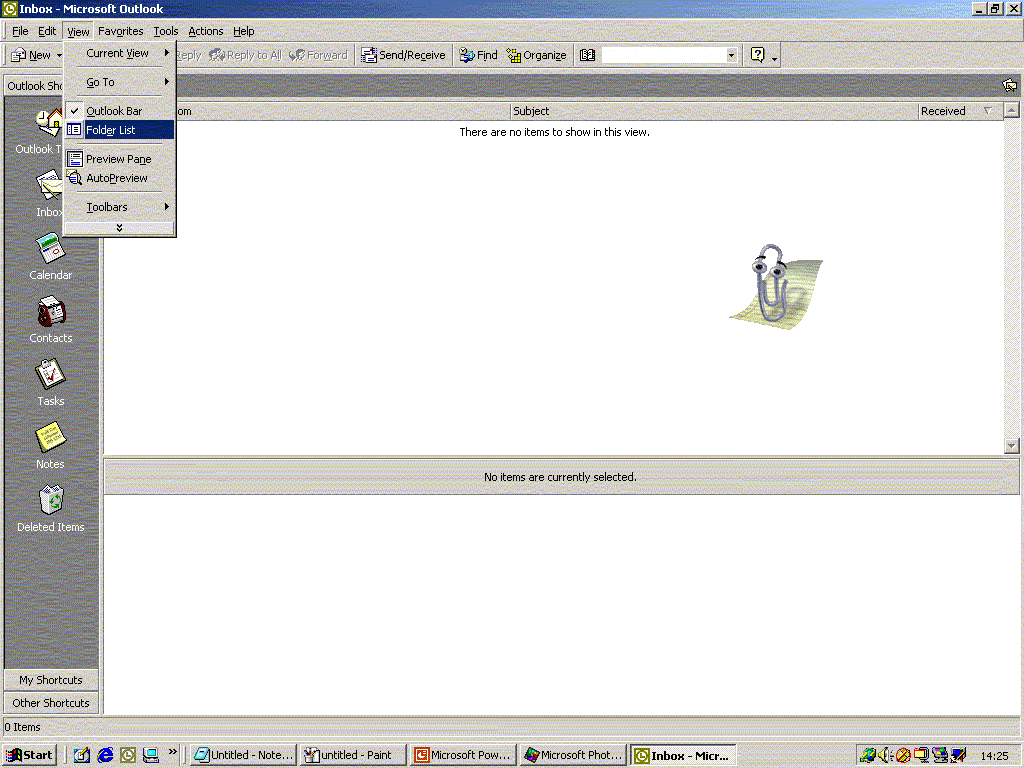
1. Go to
the View drop down menu, and select "Folder List". See
Here >>
2. The Folders List will appear on the left of Microsoft
Outlook. Scroll down the column/ list to reach Public Folders. Double Left Click
on Public folders to open them. Try and locate the exam papers for this module
IE4711. See Here >>
The Internet is accessible from all computers. For this module, one will need
to be able to search the UL Library, Electronic databases and the General
Internet using a search engine.
General Purpose Search Engine : www.google.com
UL
Library Main Home Page : www.ul.ie/~library
From
the UL Main Home Page, both the UL catalogue and electronic databases can be
obtained. See Here >>