Lab 6 Week 9
Microsoft PowerPoint
The majority of the exercises in this lab are based on "A Guide to
PowerPoint 2000" (available from the print room).
<< -- Return Home
Make sure you can find Microsoft PowerPoint on the UL Computers. This was
covered in Lab 1 Week 3!
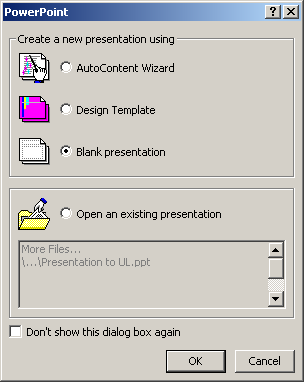
On opening Microsoft PowerPoint from the start menu, the following Dialog
appears:

The four options are self explanatory. Experiment with the first two options in
your time. For this lab, select "Blank Presentation" and click OK.
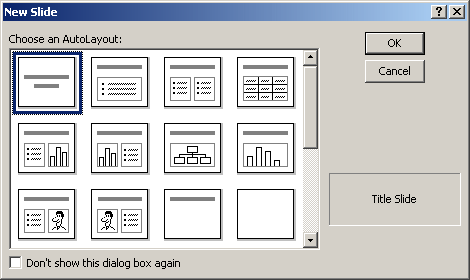
The following Dialog then appears, and will appear for each new Slide Inserted
into the presentation afterwards:

Selecting the most appropriate Slide Layout, alleviates the need for inserting
text boxes and pictures afterwards.
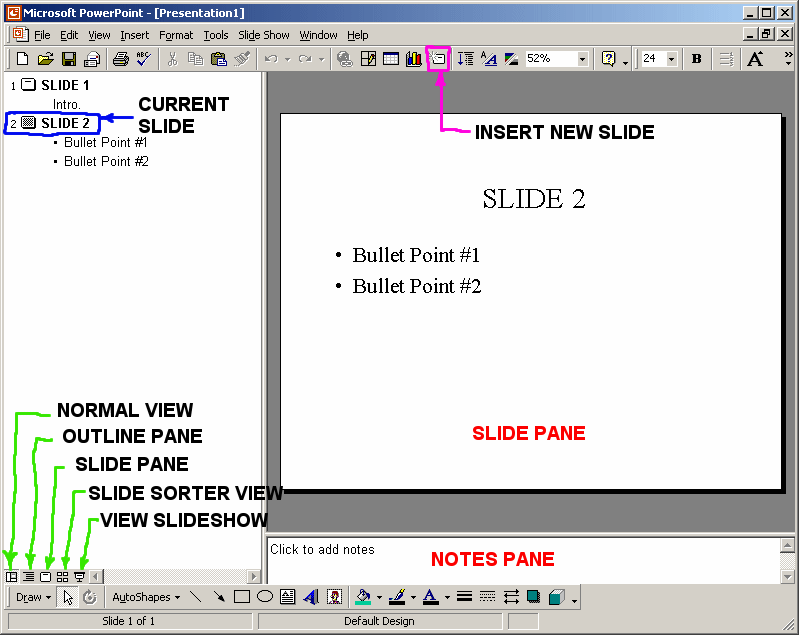
The Basic Layout of Microsoft PowerPoint can be seen below:

Exercise 1:
1. Create an attractive 4-slide presentation about yourself to be used at an
INTERVIEW for a job of your choice.
Hints: Talk about projects completed, previous work
experiences, interests etc.
2. Design and Create a University of Limerick appearance to the Presentation, by
using department and university Logo's and text.
3. Create your own "Background" to the presentation, using either
Gradient, Textured, Patterned, or the Picture option in "FILL
EFFECTS".
4. Insert the Date, Page Number and your Name on the bottom of every slide,
similar to the picture below:

Hints:
After going to the INSERT Drop-Down menu and inserting Slide Numbers, and after
going to the VIEW Drop-Down menu and inserting the "Headers and
Footers", go back to the VIEW Drop-Down menu, and select MASTER, and select
SLIDE MASTER. This will allow you to tweak the Footer and Page numbering. To
return to normal = go to the VIEW Drop-Down menu and select NORMAL.
5. Go to the SLIDE SORTER VIEW  and set-up the TRANSITIONS for the powerpoint
presentation.
6. Setup the TRANSITIONS, so that each bullet will appear with a click of the
mouse.
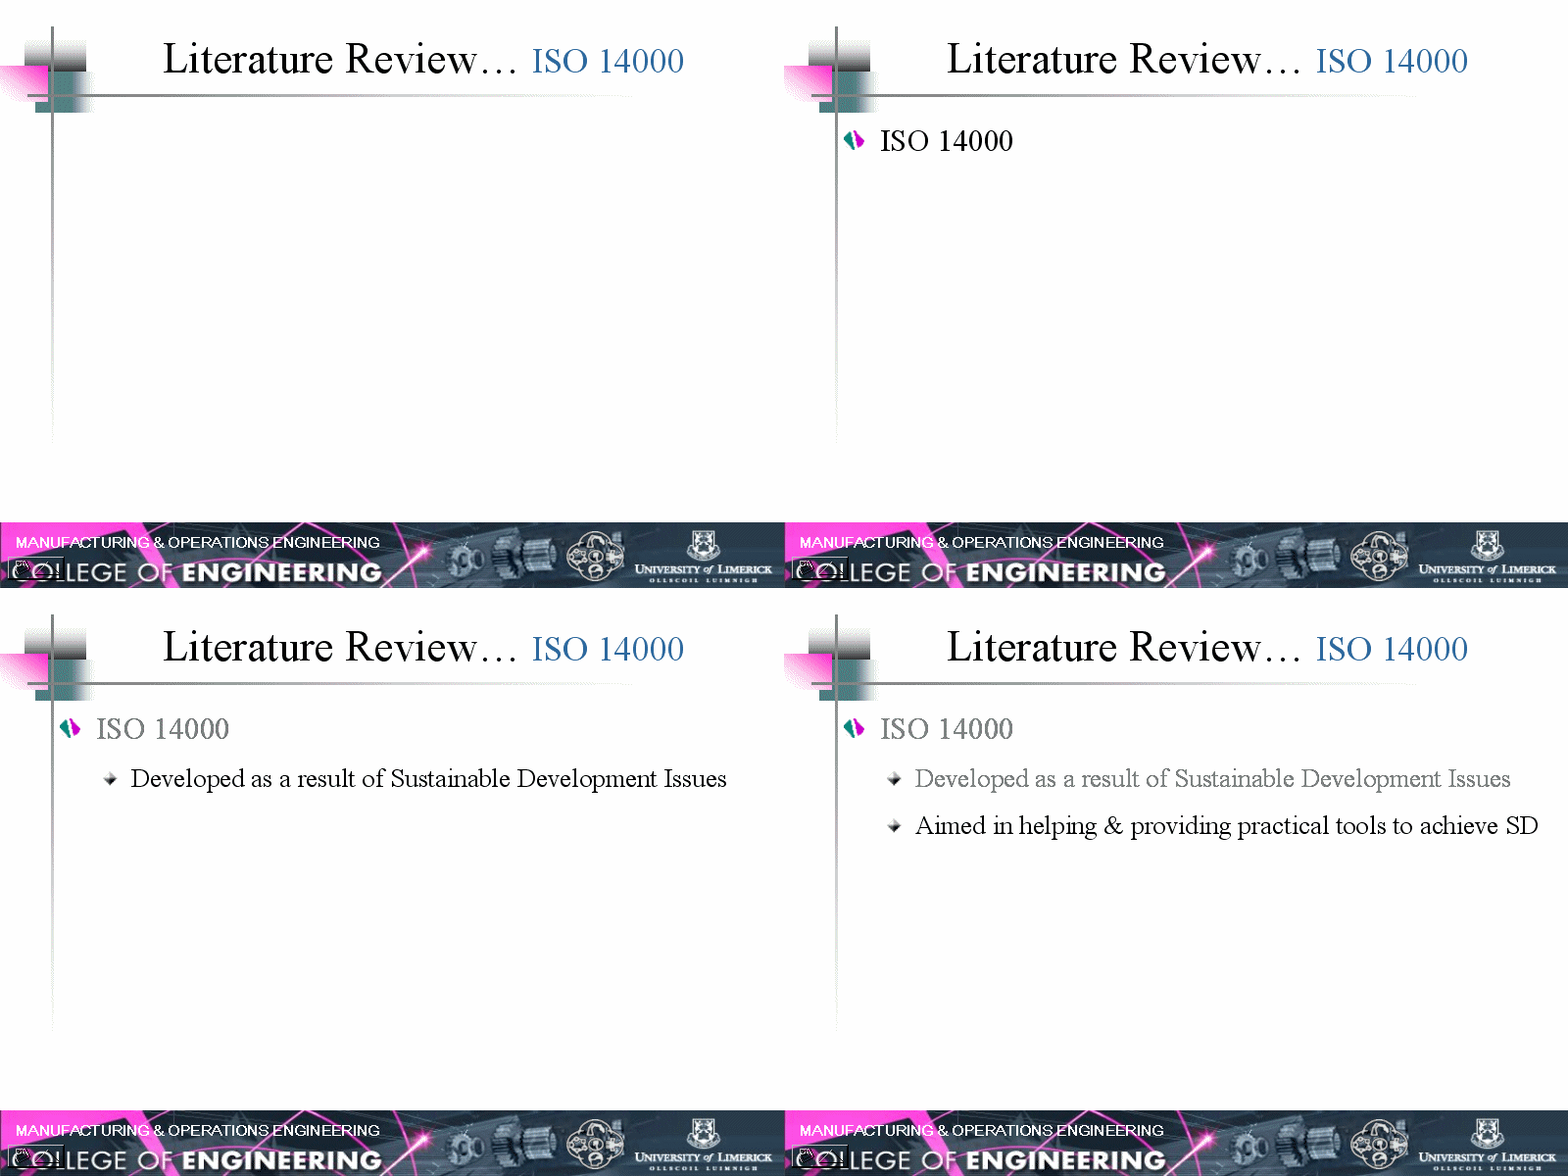
7. Setup the Custom Animation, so each Bullet point will DIM once a NEW BULLET
appears. (see animation below for the idea)

How To: From the SLIDESHOW Drop-Down menu, and select
"Custom Animation ...". In the EFFECTS tab at the bottom, the settings
for "After Animation" are visible.
8. Setup the timing of the presentation so that the presentation will run
automatically.
How to: From the "SLIDE SHOW" Drop-Down menu,
select "Slide Transitions ..."
Press 'F5' to run the Presentation
9. Prepare a "Handout" of the 4 slide presentation to
handout on the day of the interview.
Hint: From the FILE Drop-Down menu, select
"Print". In the Print Dialog box, select 'HANDOUTS' in the "Print
What" drop down menu. See Here >>


 and set-up the TRANSITIONS for the powerpoint
presentation.