Model the Hand Wheel below using the measurements given.
MODEL THE RIM NEXT
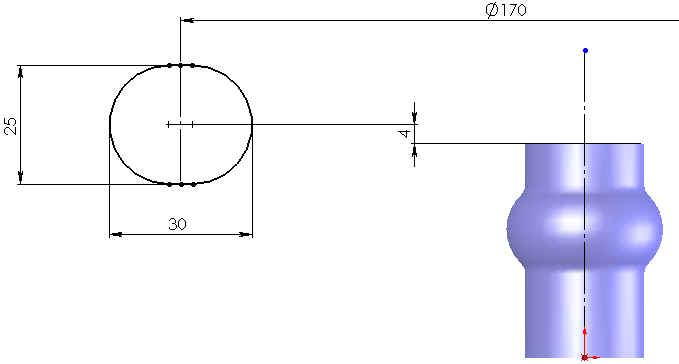
Produce the Following Sketch on the FRONT plane and revolve.
MODEL ONE SPOKE NEXT using a SWEEP. Two seperate sketches are required for a SWEEP, A Path and a Profile
Produce the following Sketch for the
Path on the FRONT plane. (Turn Shading to "Hidden Lines Visible")
(In make the further most left point fully defined, the previous sketch must
be UnHidden and used. Inside Revolve2 in the Design Tree, right click on the
Rim sketch and go "SHOW".)
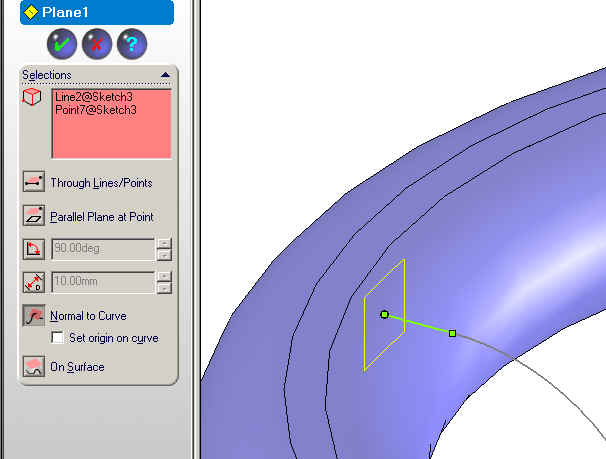
In order to produce the PROFILE, a PLANE must be inserted Perpendicular
to the above finished sketch.
(Method: HOLD DOWN THE CTRL Key. Select the end Point first, then select the
small straight line segement. Release the CTRL key. Go to the INSERT
drop-down menu, and select "Reference Geometry" and select PLANE.
Click ok on obtaining the following preview.)
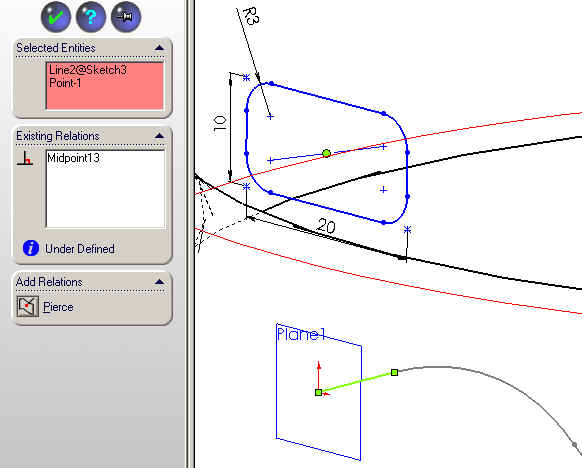
Produce
the Profile Sketch on this Plane.
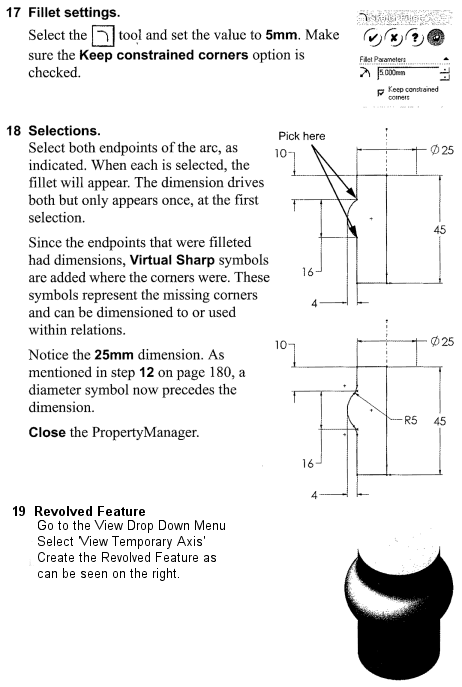
(When the Profile is sketched, Right Click on the Diagonal Center Line and
go "SELECT MIDPOINT", Hold down the CTRL key, and Select the end
straight segment of the Path Sketch previous drawn, and select
"Pierce".
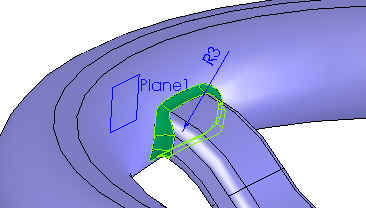
Select
SWEEP, and Sweep the previous Profile along the Path.
Place a 3mm Fillet as can be seen below:
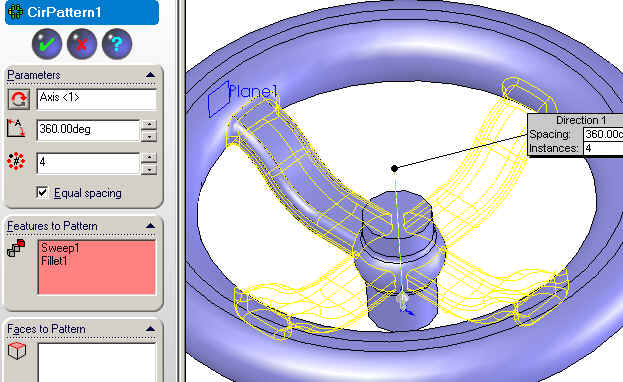
USE
A CIRCULAR PATTERN TO Pattern around the Spokes and the Fillet.
(In order to SEE the AXIS (1), Go to the VIEW Drop-Down menu, and Turn on
"Temporary Axis")
THE REST OF THE PROCEDURE TO COMPLETE THE WHEEL IS SIMILAR TO THE PREVIOUS: